
On Instagram, getting a verified badge is a big deal. This blue check mark shows that an account is accurate and belongs to the famous person or brand it claims to be. This isn’t just about looking important; it’s about protection. It stops imposters and ensures that when you talk to a celebrity or brand, it’s the real deal. With so many users and profiles on Instagram, this verification sorts out the real influencers from the fakes, keeping the platform safe and reliable for everyone.
How to Get Verified on Instagram
Instagram Verified Badges
You can get a verified badge on Instagram in two ways.
- Request a Verification (Free)
- Subscribe to Meta Verified (Paid)
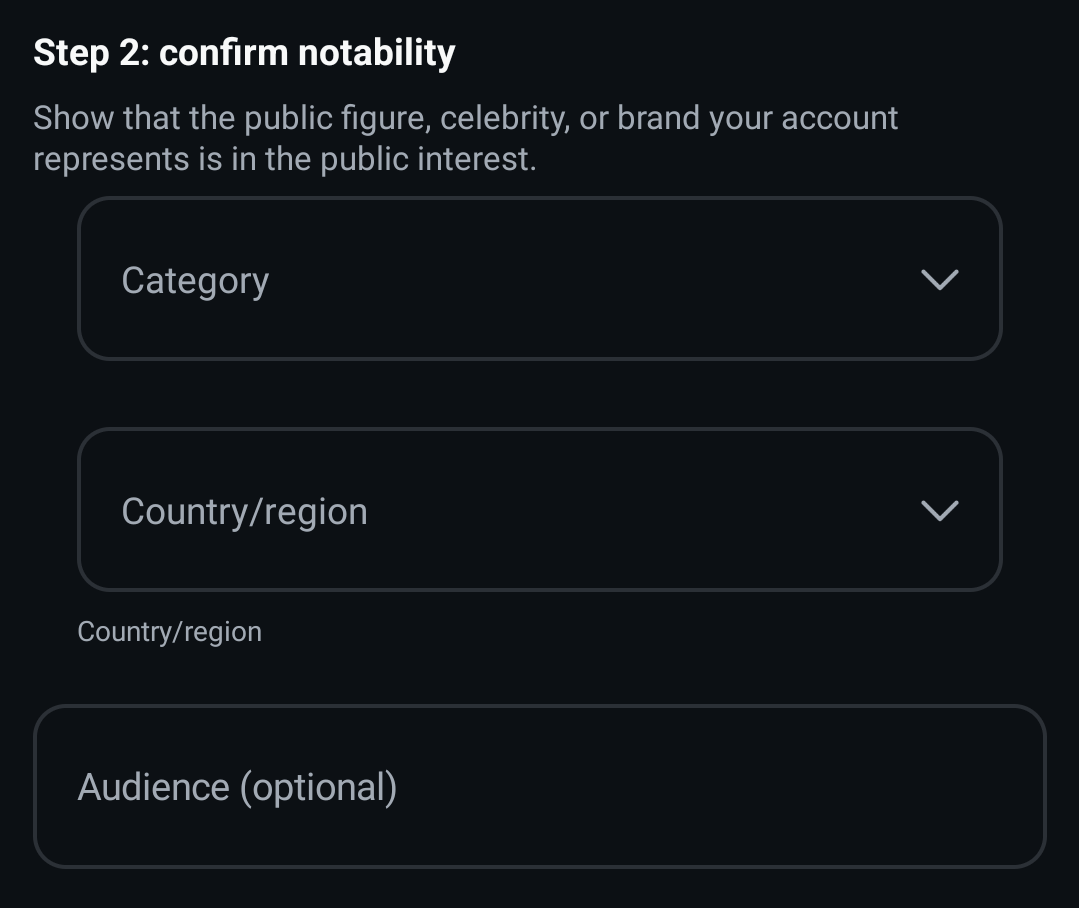
Verified Badges: These belong to notable people, brands, or entities. Instagram verifies the accounts according to the user’s activity across Instagram’s products, and the provided documentation.
Meta Verified: This is a paid monthly subscription. It includes features like a verified badge, account support, impersonation protection, and more.
Note That: If you already have a verified badge, you can still subscribe to Meta Verified.
Method1: By Requesting Verification (Free)
Eligibility to Request a Verification
To get verified on Instagram, your profile must meet these criteria:
- Authenticity: The account must be genuine and belong to a real person or business. It should not imitate another profile.
- Uniqueness: Only one account per person or business can be verified, except for language-specific accounts. General interest accounts, like @puppymemes, are not verified.
- Public Profile: Unlike Meta Verified, which works for both private and public profiles, organic verification is only for public accounts.
- Complete Profile: Your account must have a bio and a profile picture.
- Active Account: Make sure your profile is active when applying for verification.
- Notable Presence: The account must represent a well-known, highly searched-for person, brand, or entity.
Steps to Request a Verification
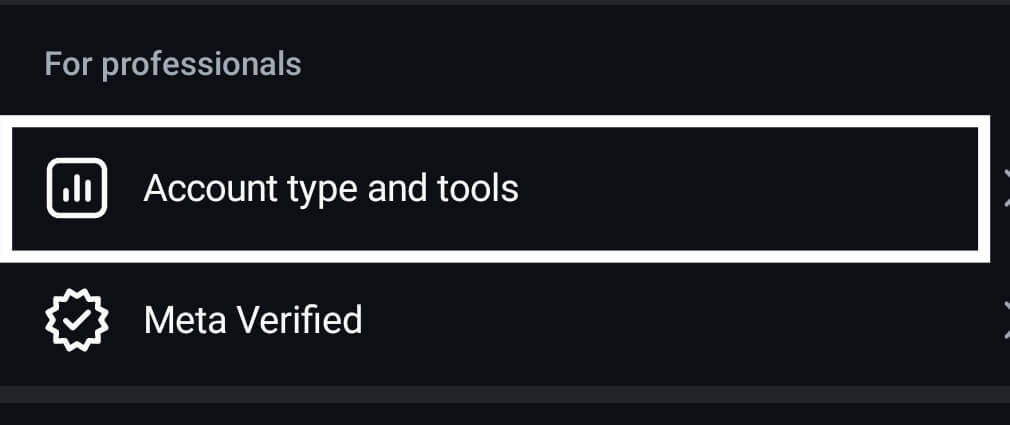
- Go to your Instagram profile.
- Tap the menu icon (three lines).
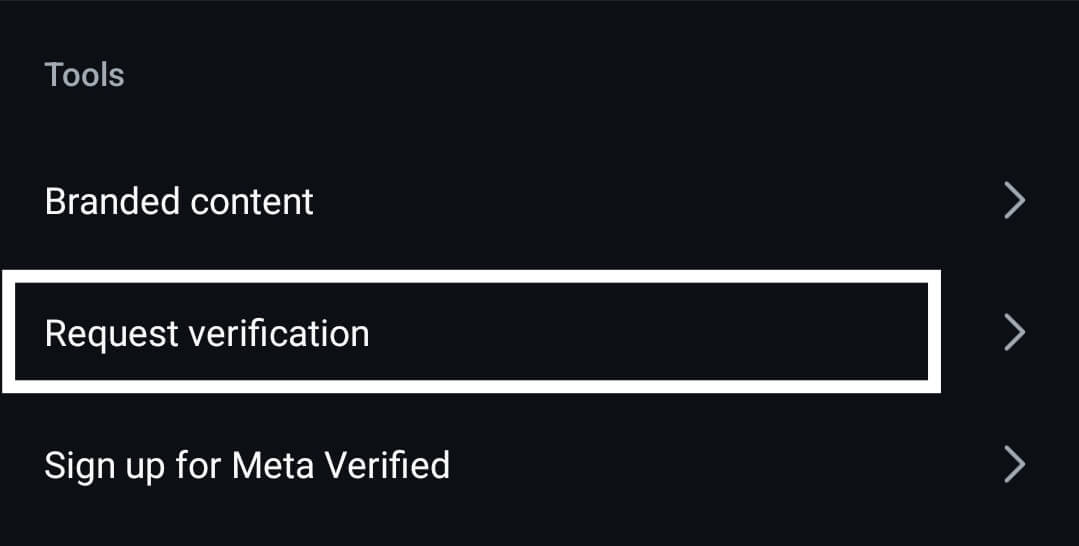
- Tap “Account Type and Tools.”
- Tap “Request Verification.”
- Fill out the form with your legal name.
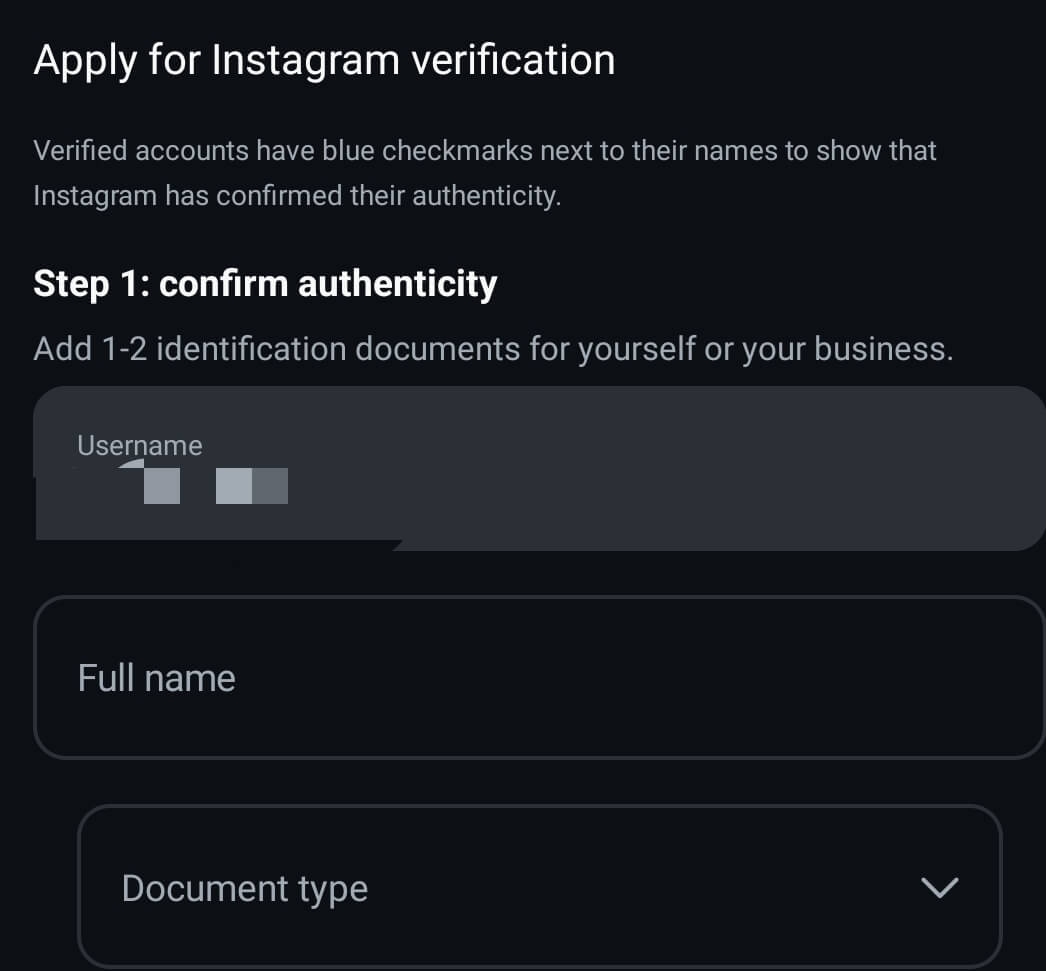
- Enter your professional name, if any.
- Select a category for your account.
- Attach a photo of your government-issued ID.
- Submit the form.
- Wait for Instagram’s response.
Important Note:
- Ensure your username is final before applying for a verified badge. Once verified, you can’t change it.
- Use accurate information during the verification process. If you use false or misleading info, your badge will be removed, and your account may be disabled.
Also Read: How To See Who Stalks Your Instagram Profile
Method 2: By Getting Meta Verified (Paid)
If you’re interested in getting verified on Instagram, you might want to try Meta Verified. It’s a paid service that costs $11.99 a month on the web or $14.99 on mobile. For this, you get the blue checkmark, plus some extras like identity monitoring, better support, and unique stickers.
Eligibility Criteria to Get Meta Verified
Applicant’s Eligibility:
To subscribe to Meta Verified for creators, you need to:
- Be at least 18 years old, or the age of majority in your country.
- Be in a country where Meta Verified is available.
- Have an eligible Instagram or Facebook account.
- Have a valid government-issued photo ID.
- Agree to and follow Instagram’s Terms of Service, Instagram Terms of Use, Facebook Terms of Service, Facebook Community Standards, and Instagram Community Guidelines.
Account Eligibility:
You can verify up to two profiles (one Instagram and one Facebook) linked to the same Accounts Center. Both profiles must have two-factor authentication enabled and may need to have the same name and picture.
- Must be a personal or professional creator account with a profile picture and a profile name that meet Meta Verified naming standards.
- Must not exceed the limit for changes to your account within a set time period.
- You must have two-factor authentication enabled.
- Must meet minimum activity requirements, like prior posting history.
- Must follow Instagram’s Terms of Use and Community Guidelines.
Note:
- Eligibility requirements may change as Instagram improves the product experience.
- Facebook Account Eligibility can be different to get meta verified.
Steps to Get Meta Verified
- First, Open the Instagram app on your Android or iOS device.
- Go to your Profile and tap the Menu (three lines) in the top right corner.
- Find the Meta Verified option and tap on it.
- Tap Subscribe and then tap Sign up on the next page.
- In the payment window, tap Pay now, choose your payment method, and hit Subscribe to make the payment.
- Submit verification by sending a photo of your government-issued ID along with a selfie video.
Note That:
- After applying for Meta verification, you’ll get a response within 48 hours about whether your request is accepted.
- If you paid the Meta Verified subscription fee and your account isn’t verified after two tries, you’ll get a refund within 60 days.
- If your account is suspended for violating Meta Verified eligibility criteria, Instagram’s Terms of Use, or Community Guidelines, your Meta Verified subscription will be canceled, and you won’t receive a refund.
Also Read: What Happens When You Restrict Someone On Instagram
Conclusion
To get the blue tick on Instagram, you need to follow a few steps. You can either apply directly or use Meta Verified. Make sure your account is accurate, notable, and active. This means having a trustworthy online profile and sticking to Instagram’s rules. Getting verified makes your profile look more credible and can help you interact more with others. It’s a helpful way to manage your online identity and boost your social media impact.
Keep Visiting Save Community regularly for more such informative articles.

Emily Johnson is the creative force behind Save Community’s content strategy, focusing on social media articles. With her background in digital marketing and her knack for design, Emily creates content that’s both engaging and visually stunning. Her storytelling skills and keen understanding of brand voices make her an essential part of our team.